When you start your own photography businesses, one way to stand out from the crowd is to become a master of lighting.
After all, photography is the capture of light.
First, how cameras capture light…
Before we get into the practical tips on lighting, it may help to understand light’s role in photography at the camera level. Don’t worry, we’ll keep it brief!
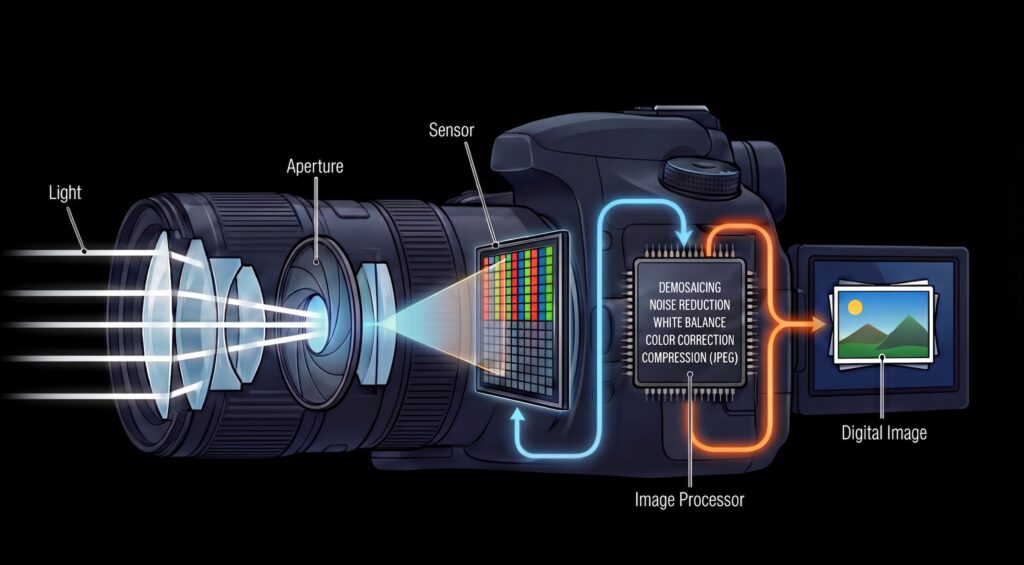
Light enters the lens and passes through a small hole, called the “aperture.” It reaches the sensor which converts the light into an electrical signal. The electrical signal is then passed to a circuit board that processes the signal into a digital image that can be displayed on screens.
Without light, we wouldn’t be able to capture photos at all.
It is the fundamental building block for everything photographers do.
So, what better way to grow as an artist and level up your photography skills than to improve your understanding of light?
Let’s get into the practical advice, now.
Here are 7 beginner lighting tips that will illuminate the way for you to better photos.
1. Practice evaluating your environment
Take a look around you, wherever you are at the moment.
You’re part of a scene.
How would you describe the lighting? What kinds of lights are around you?
This isn’t the type of thing a person would normally stop and think about when walking into a room, but if you’re a photographer, you have to learn this essential skill.
Here are 3 questions you might ask yourself:
- Where is the light coming from? What are the light sources? How big are they?
- Is the light creating hard or soft shadows?
- What color are the lights? Are the tones warm or cool? Do they match?

Not all light sources are created equal. They each have unique attributes like size, brightness, and temperature. Different light sources can work together—or they can work against each other.
Wherever you are, the first step to becoming a master at lighting is to look around you and see what you have to work with.
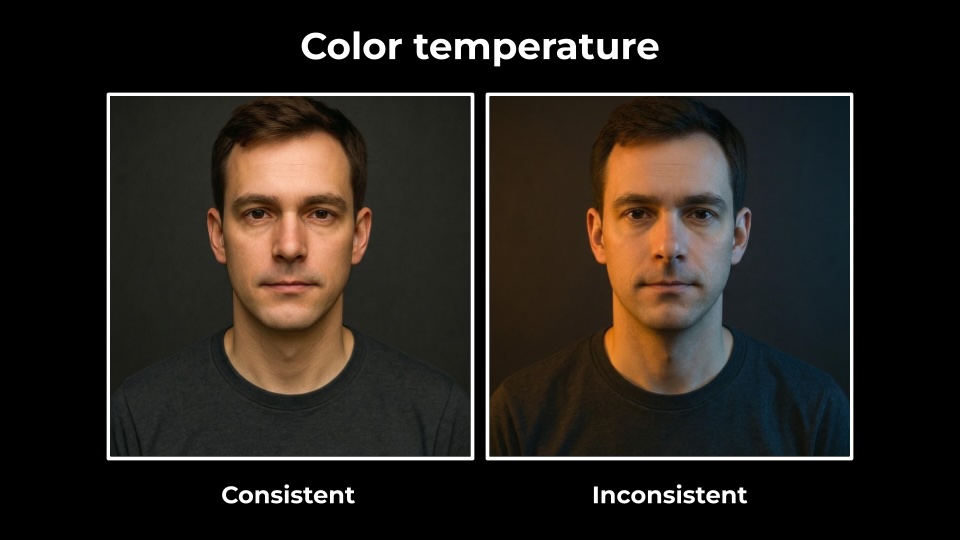
2. Pay attention to color temperatures
“One of the biggest challenges when lighting on location for video or stills is all the different color temperatures.”
If you’ve ever bought a pack of light bulbs, you’ve dealt with color temperatures. Soft white, bright white or cool white—they all have a completely different look that can throw you off if you try to mix and match. If you read the fine print on these bulbs, you can discover what their actual estimated color temperature value is, measured in units of kelvin.
As a photographer, you’ll need to get used to thinking in terms of kelvin values.
It’s important to set your camera’s white balance correctly for your environment, but this becomes next to impossible in mixing lighting, where multiple light sources have very different kelvin values.
This is because your camera can only match one of the temperature values to true white. Other kelvin values in the mix will either look too warm or cool and can throw off your shot.
The key is to always try to match up the light color temperatures in your scene, especially when they are not just background elements but actually cast significant light onto your subject.
3. Start with the key light
The “key” light is your dominant light source.
It’s simple to figure out your key light. Just ask, “What is the brightest light in the room?” That’s your key light. In an indoor or studio situation, you can control the key light.
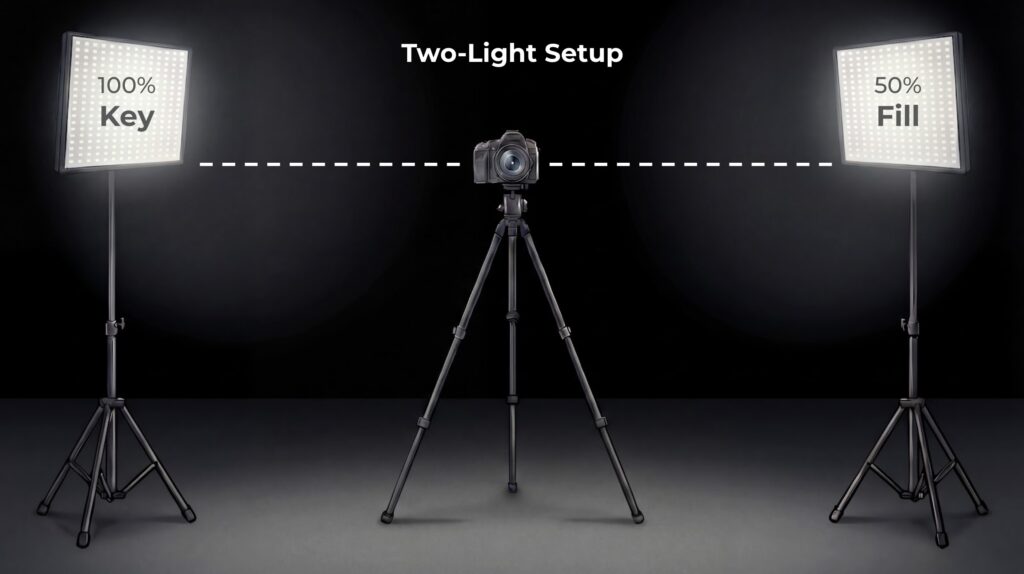
In a two-light setup, your brightest light is your “key” light. It creates the shadows. You “fill” light is less bright, and helps to “fill” in the shadows.
“You need to be able to control your light sources to ensure your subject won’t have any distracting shadows or colors on their face.”
If you’re shooting outside during the day, the key light source will typically be the sun. It’s challenging and unadvisable to try to overpower the sun with light sources. One exception is during “golden hour,” the moments during sunset when the sun is at its furthest angle. During this time, the sun is less intense and casts a beautiful warm hue on subjects.
If you do need to compete with the sun, then using a flash, a reflector, and/or putting your subject in the shade is your best option. The drawback to shooting in the shade is that if your background is in broad daylight, it is easy to get blown out images where parts are overexposed and detail is lost.
In some cases, controlling the sun as a photographer simply means diffusing it over your subject with a “scrim” or blocking completely with a heavy black piece of fabric called a “flag.”
If it’s a cloudy day, you’re in luck for your portrait session because the sun is already diffused. You won’t get a big blue sky in the background—but it’s always more important that your subject is well-lit.
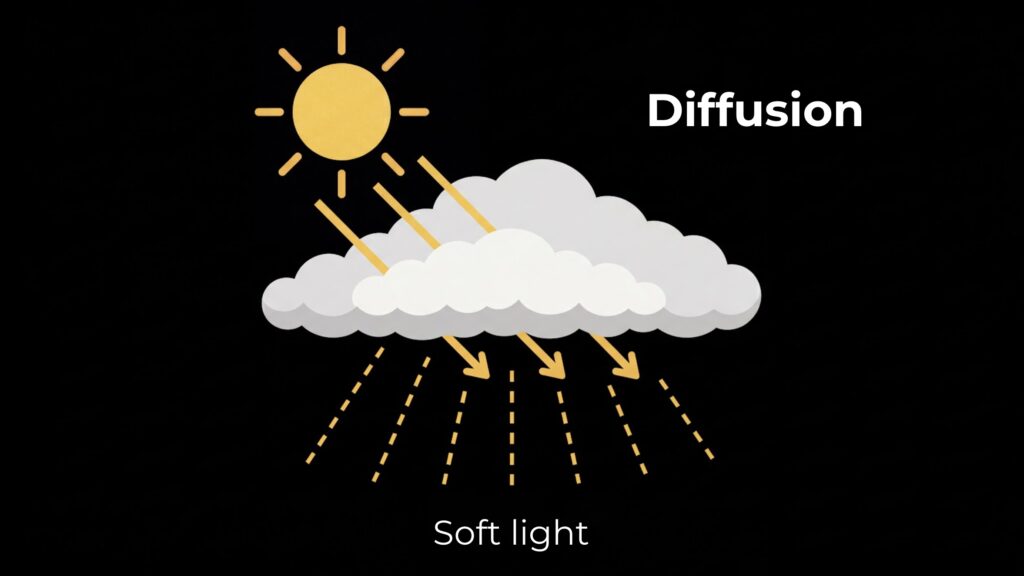
On a cloudy day, the clouds become your light source, creating one large source of soft light.
4. Use shadows to create contrast in your images
In general, the more light the better. Having enough light makes it possible to get your exposure settings right later on.
However, you can’t have light without shadows. They are like two sides of the same coin. And shadows are not necessarily bad, because they create contrast, and that adds depth to images. You can’t have an image with beautiful contrast unless the image includes sections that are brighter and parts that are darker.
Take a moment while you’re composing your image to think about what you want to be dark in your photos, in addition to what you want to be illuminated. Visualize it and then position your subjects or your lights to create contrast. In time, this will become second nature.
Considering darkness as part of your process will give your images a more dynamic look and make you stand out from the novice who attempts to “make everything bright.”
However, there are two types of shadows: hard and soft. Hard light creates hard shadows, soft light creates soft shadows, and the terms are used interchangeably.
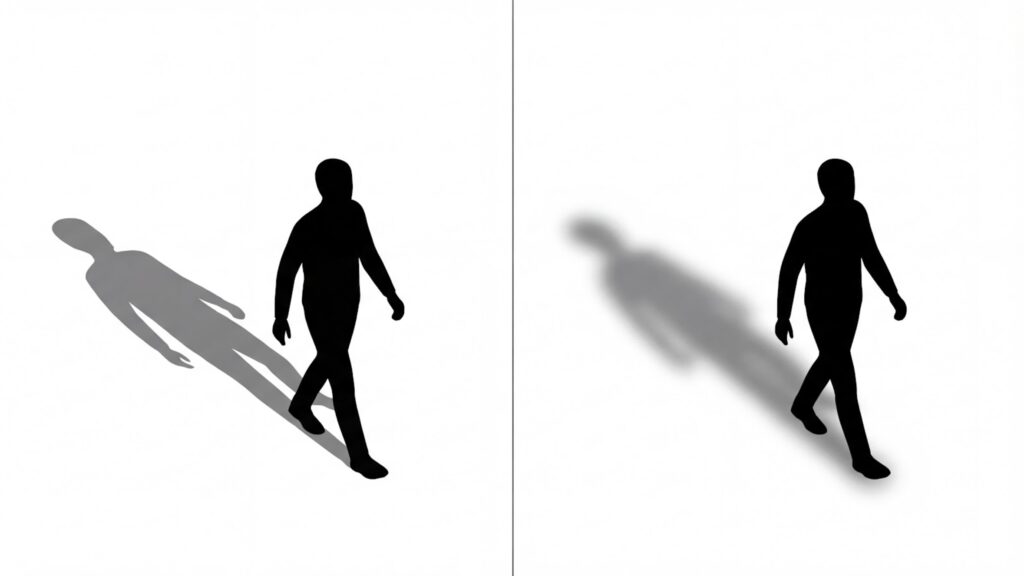
Generally, soft shadows are more pleasing for lifestyle images. Hard shadows create fine lines and make skin imperfections more obvious.
The way to create soft shadows is with a larger light source, like the cloudy day we talked about earlier. Smaller light sources are referred to as “hard light” and create hard shadows.
5. Create space between your light and the camera
Have you encountered bright spots on your subjects’ foreheads from flashes? Bright spots in their eyes? That might be because the light you’re using is too close to your lens. The beam of light is bouncing back directly into the camera from the source, causing a harsh reflection.
Videographers or photographers should avoid relying solely on a camera-mounted flash pointed directly at the subject because of this unpleasing effect. Often, a camera mounted flash performs better if you can bounce it off the ceiling or wall instead.
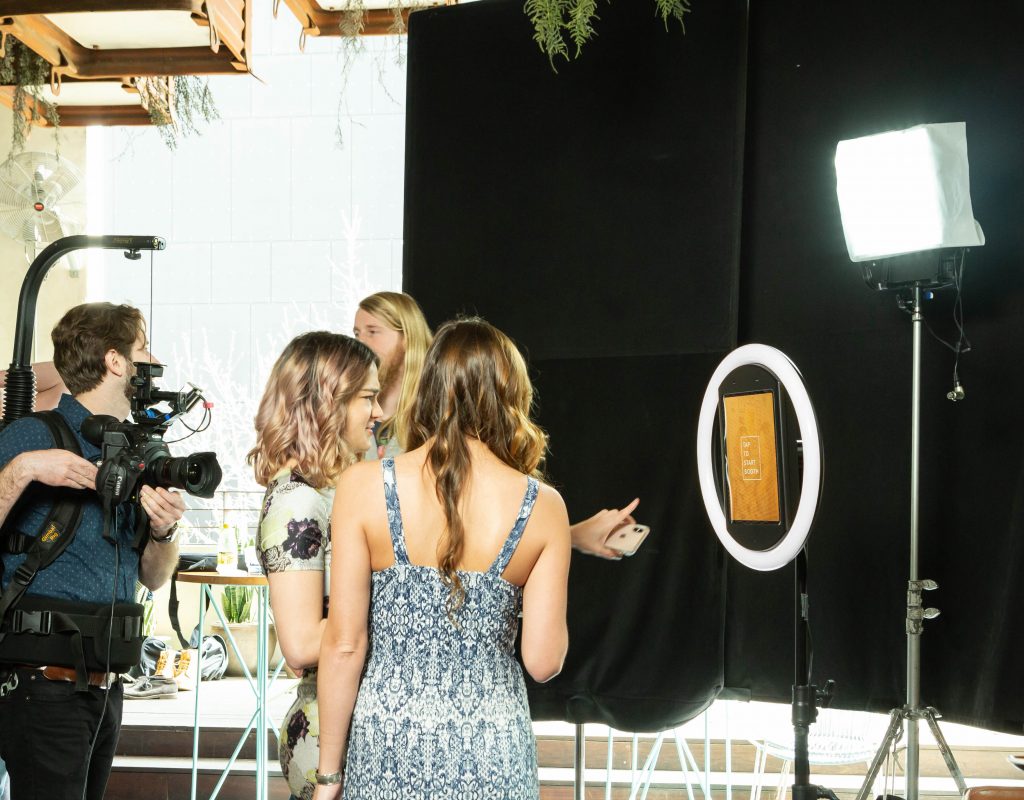
For portrait photography, an ideal setup is to have a key light on one side of the camera and a fill light on the other, situated at least several feet away. This will diffuse the light and prevent those nasty bounce-back effects.
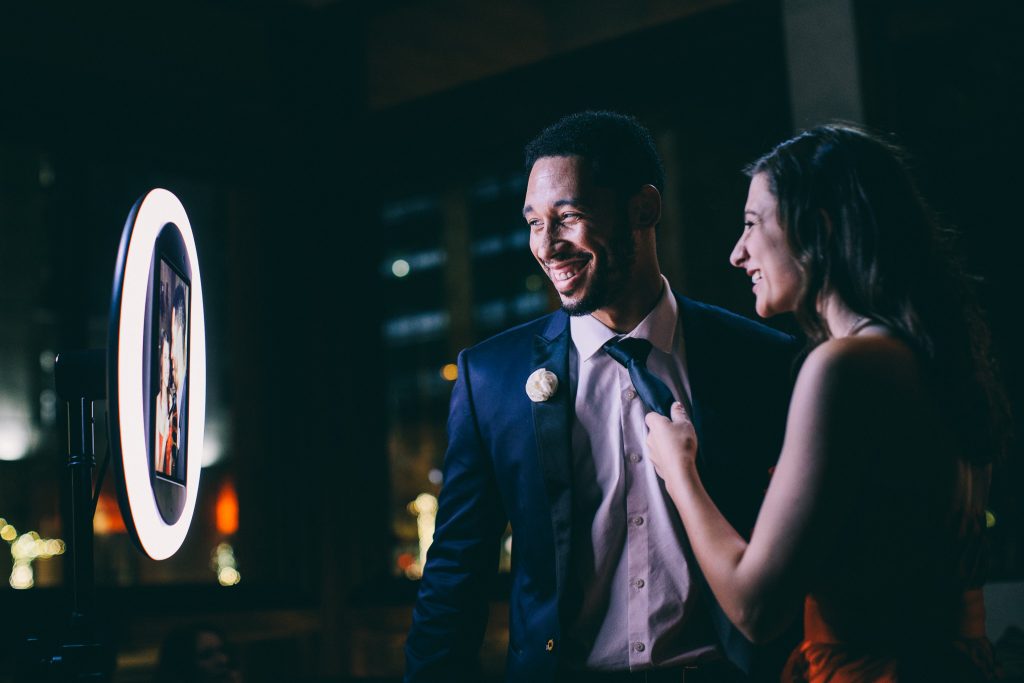
If you can’t do a lighting set up like this, a ring light that goes completely around the camera is a good bet for soft portrait looks. This type of light prevents any single “hot spot” from appearing on the subject’s face and fills in shadows nicely, making wrinkles and imperfections less noticeable.
For portraits, we recommend placing your light source above or around the camera. This makes shadows point down, which is a natural look, since humans are adapted to the sun which is normally overhead.
Putting your light source underneath the subject is a good way to create a more intimidating effect.
6. Try edge lighting
We talked about two-point lighting earlier. But what is three-point lighting?
Simply put, it means adding a light to the side or slightly behind your subjects.
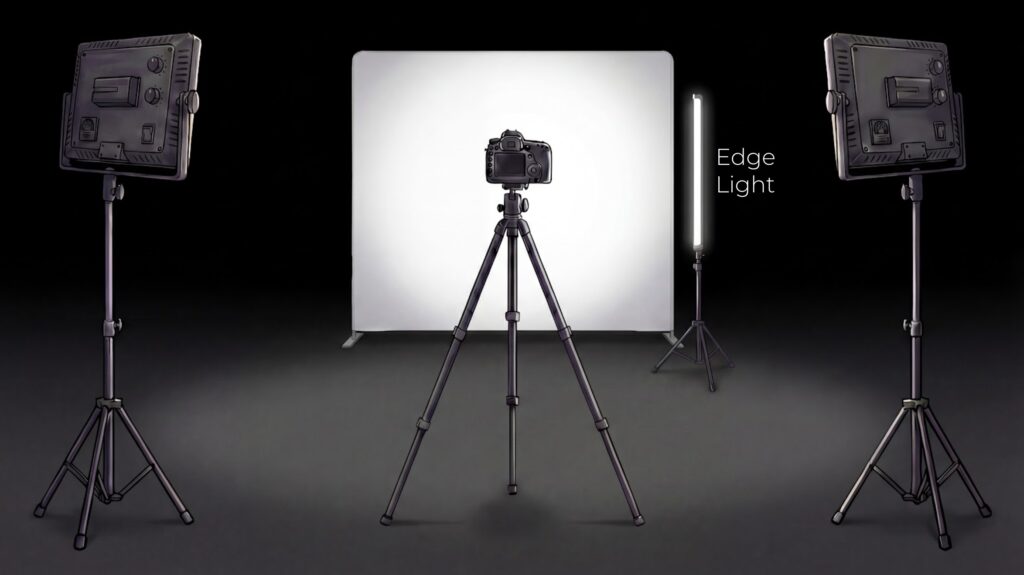
This is called an “edge light” or “back light”. It can be hard light, because it’s goal is to simply create a contrasting edge on the side of your subject’s face or body.
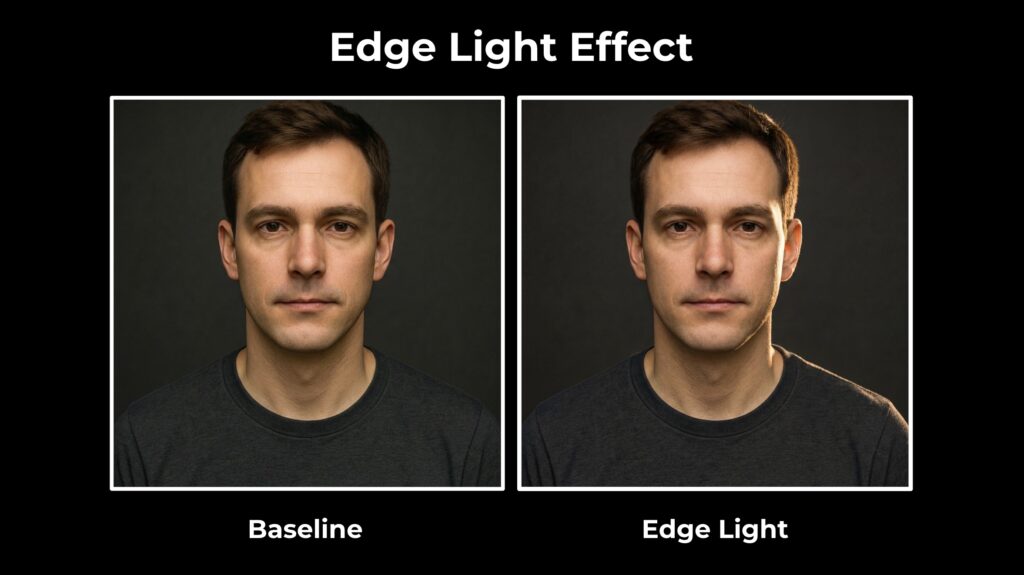
This helps your subject to stand out against the background.
7. Recognize the quality of light
The sun is humanity’s reference point for light, and so it sets the standard for how we measure all other light sources. Specifically, light quality is measured by Color Rendering Index (CRI). The max value of CRI is 100. And what light has 100 CRI? You guessed it, the sun.
Natural daylight is generally considered the best light source because of it’s broad spectrum.
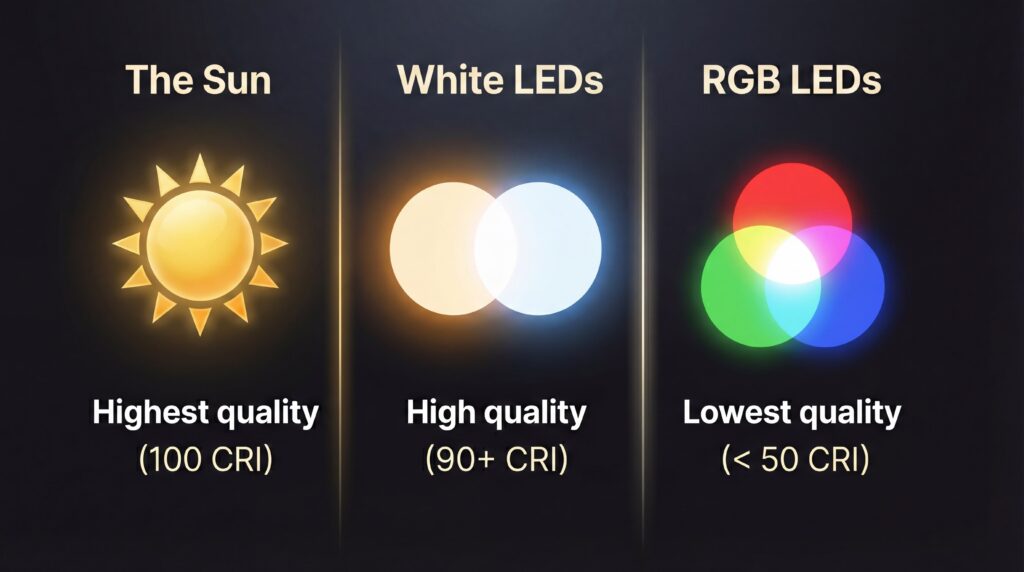
A CRI over 80 is generally considered “good.” Most modern LEDs achieve 80+ CRI if they are white. If they are merely red, green, and blue being mixed together, they don’t cover the whole spectrum very well.
That’s a problem because, remember our infographic earlier that showed how cameras captured light? As the saying goes, “garbage in, garbage out.” If you don’t have high quality light coming into the camera, the final image will not have the truest and most accurate colors.
For casual viewers, this may not matter. But as professionals, it’s our duty to care, especially because the human eye’s perception of skin-tones is very sensitive to even slight discolorations. Poor quality light can be a culprit.
8. Get a light kit to start practicing!
You’re not going to grow as a photographer until you have a few lights to experiment with!
Fortunately, with the advances in LED technology, there are tons of options for bright and portable lighting setups to choose from.
In our DIY photo booth guide, we walk through a variety of lighting setups for indoor portrait situations with links to specific gear. These setups include LED two-light panel kits, tube lights, and ring lights. We recommend this article for continued reading and finding some gear to help you grow.
A final tip for beginners
Lighting is a little more complicated than most people expect because we so often take it for-granted in our daily lives.
It takes a lot of time and practice to become great at lighting.
If you can, seek out an experienced Director of Photography (DP) or lighting expert to learn from and assist on their projects. You will discover so much about the equipment they use and how they handle different situations.
Having a mentor and getting hands-on experience is by far the fastest way to get better at lighting!
Want great lighting for a professional photo booth? Simple Booth HALO is our turn-key photo booth solution for studio-quality lighting, every time.